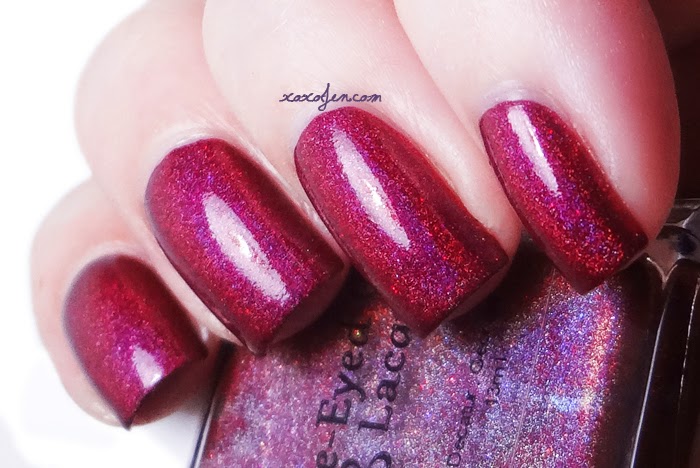
The Addicted to Holos box is brand new bi-monthly polish box packed with holographic goodness from five different polish brands and it's launching for the first time in February. Aren't the polishes pretty? Read on for more images and details about each!
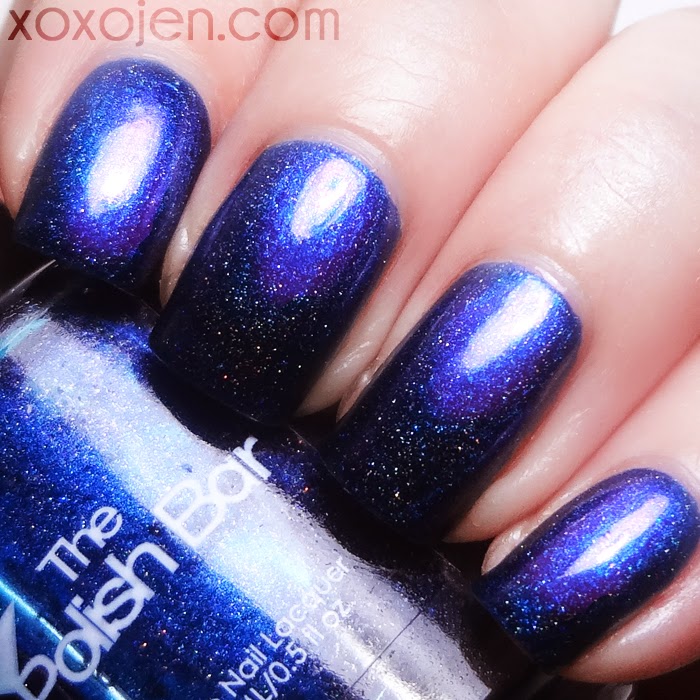
The Polish Bar created Midnight Kiss for us who love shifty holos - they DO have quite the entertainment value! When I was applying it I felt like I was painting outer space on my nails. It's described as a blue-purple duochrome linear holo with silver micro glitter. I have to say though, while I was indoors at work I also saw a beautiful deep shade of teal! I wore two coats for opacity and the formula is one of those that you want to get the first coat down with as few brush strokes as possible, then the second coat glides on smooth and easy.
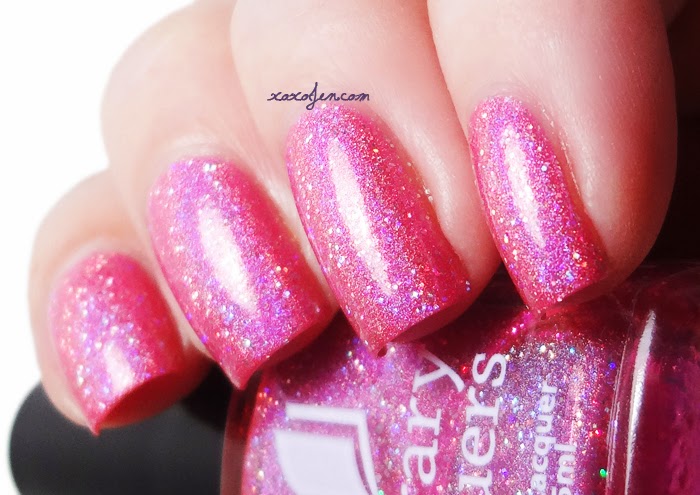
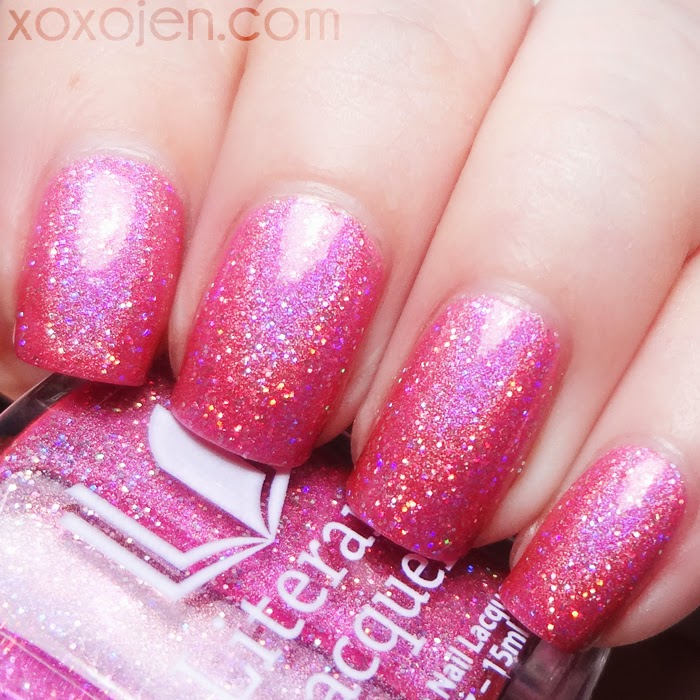
Literary Lacquers contributed Laughs in Flowers which is a princess-y shade of pink filled with holographic fairy dusts of all different sizes. It was inspired by Ralph Waldo Emerson's poem, Hamatreya. Amy says that this polish is like her Tequila Mockingbird and the Always Winter Never Christmas polishes had a nail polish baby. And I have to agree, this one is a real stunner and my favorite in the box! I wore two coats for opacity, formula was perfect as we've come to expect from Literary Lacquers polishes.
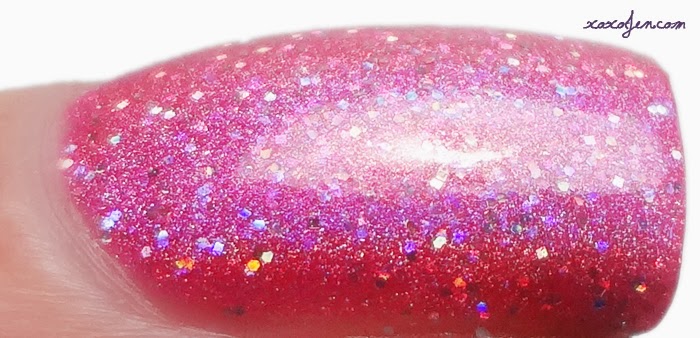
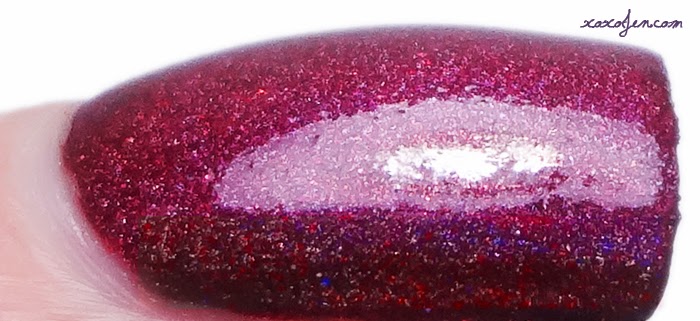
Cuts in My Heart is made by Blue-Eyed Girl Lacquer and is an ox blood red linear holographic with silver and red holographic microglitters. It may dry a bit textured due to the glitters in the polish. In one coat this was opaque and it stamps beautifully over lighter shades. I'm seeing a lot of the gold from the holo rainbow flashing around in the bottle which makes for a lovely effect! The formula was on the thick side and I usually like it thick but with the glitter in it, I decided to thin it out just a wee bit so that it was a little more fluid. It's beautifully done with such a rich color while keeping the holo strong.
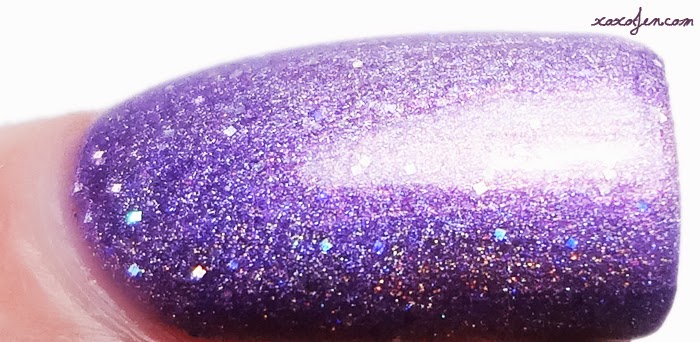
Candied Violets is made by Sweet Heart Polish and is a frosty violet mega linear holo with silver holo micro glitters. I often catch a pink shimmer in this, but it's not listed in the description. Is it there, or isn't it? The world may never know the true answer but my eyeballs say yes! I wore two coats for opacity. The first coat seemed very sheer, but I had full coverage after applying the second coat. The formula was fluid and easy to use as with other Sweet Heart Polishes.
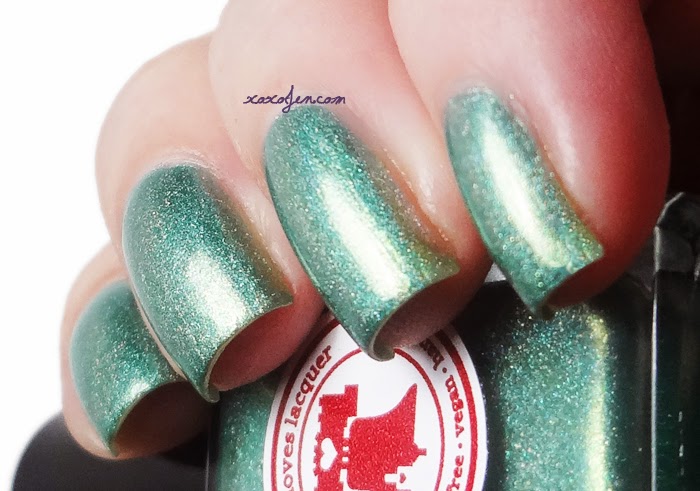
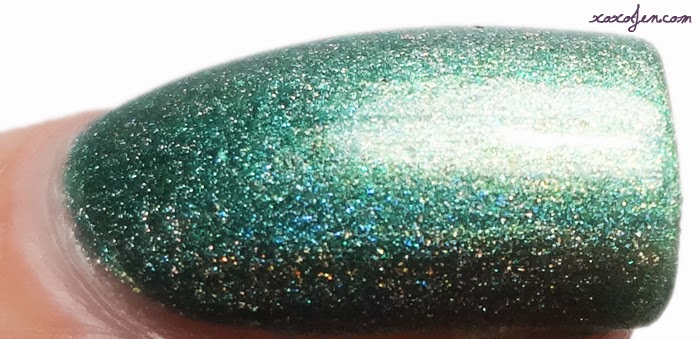
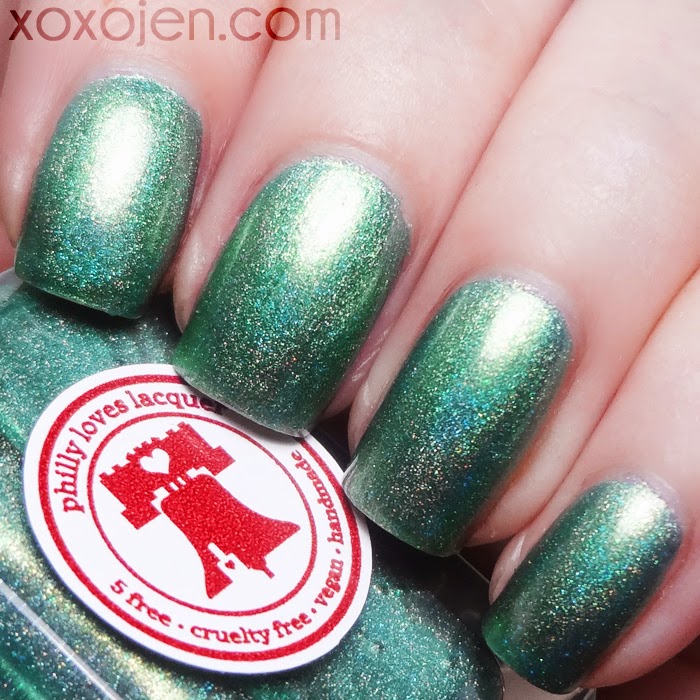
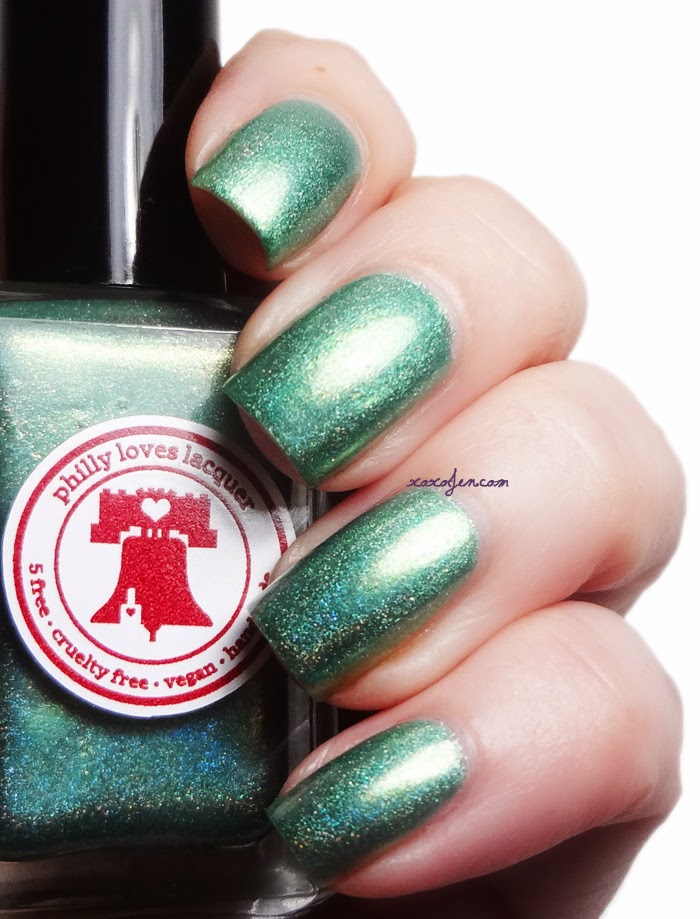
Fortunate Rainbow was made by Philly Loves Lacquer and is a blue-ish green linear holo with a gold flash and gold and green flecks. This one proved challenging to photograph! It wanted to lean blue and not show the gold, but I hope you can see that it does have a gold flash in at least one of my images. I wore two coats for opacity and I think I probably should have done a third just to get a more even coat on the sides of my nails. The formula for this one requires as few brush strokes as possible to insure a smooth finish.
So what did you think? Do we have winners here?!
I think one of the cool things about this box is that it's going to be available for preorder for a whole week - with no sell outs or rushing to order. Stress free shopping! Yay!
The preorders will be open from 2/9-2/16 at addictedtoholos.bigcartel.com which is a shared shop between the five polish artisans. Each time they launch a box, they will rotate who manages the shop. Now if that isn't coordinated teamwork, I don't know what is!
The Addicted To Holos box is $60 plus relevant shipping for the above five exclusive indie holos.
That's a wrap! Mark your calendars and bookmark the link - the next box after this one won't be until April so there's lots of time in between to enjoy your new polishes and plot out shopping for the next one!
Saturday, January 31, 2015
Monday, January 26, 2015
Nail-aid Remover Gel: Does this thing really work?!
When I found this new remover gel by nail-aid at Walmart, I immediately had the idea to do a blog entry inspired by Bunny from Youtube (grav3yardgirl). She's awesome and I love watching her videos!
This is, for the most part, a pictorial review - if you have any questions feel free to ask in comments and I will edit in the details!
The pink jar and yellow jar have the exact same ingredient list other than red colorant in the pink jar, so I only bought the yellow jar. I then submitted a contact form on the nail-aid brand website a week ago to ask if there were different percentages of each ingredient and have not yet heard back from them. As far as the ingredient list on the jars, these look like the same formula packaged two different ways - one pink and one yellow. The instructions on the jar are also the same except for step 2, which is a difference in the length of time to let the gel sit on the nail (45 seconds vs. 4 minutes).
Let's try a much more dense glitter shall we? This is two coats for full coverage, it's glitter packed!
You can read more and see product photos at http://www.norubgel.com/, unfortunately, they do not list the ingredients on the webpage. So here they are for the yellow jar:
Acetone, Water, Carbomer, PEG-15 Cocamine, Linoleic Acid, Dimethicone
The pink jar is the same exact list, except for a red colorant which is at the end of the ingredients list.
I emailed the address on their no-rub webpage since I had not gotten a reply from the brand website, and within a few hours I had a response from Jeff about the ingredients and formulation:
He didn't say how the formulation differed or offer any other details, but there you have it.
I found the formula to be super sticky, so you'll definitely want to use a paper towel to wipe and immediately wash your hands with warm soapy water. I found that I really needed to scrub and washed my hands twice, once with a foaming sugar scrub.
I would not recommend this product for a few reasons: It's not effective for heavy glitter polish. I had to wash my hands aggressively to get the sticky film off. And that made the whole removal process take longer than using a peel off base coat, a scrubby tub (better known as the A.V.) or the foil method.
Thanks for stopping by!
Questions I've received!
Q: which one did you try or did you try both??
A: I only tried the yellow jar since the ingredient list was the same with exception of the colorant. I did not feel the need to have them both.
Q: What does it smell like?
A: chemically and sharp - similar to other acetone removers.
Q: What does it feel like?
A: The gel is a lot like an aloe gel in texture. When worn it felt really cold on my nail and after wiping it off, it had a sticky feel. You'll definitely want to wash your hands after use.
Q: So....do you like it better than just regular remover? It seems like it takes just as long.
A: I kind of have mixed feelings about it! I think I may prefer it over the foil method since the gel doesn't need foil to work - so that's less trash/mess to deal with. That is really the only advantage I can quickly think of.
I often use a peel off base coat, so I don't use the foil method very often, but for my non-swatching hand where I use regular base coat, I've avoided glitters - I may start wearing them again since discovering this though! I think I want to experiment with leaving it on longer, and see if it works better than my above experiment for the high density type glitter polishes.
Q: Do the different yellow and pink jars get the same result?
A: I didn't purchase the pink jar to try, but I have seen a review of it and based on that blogger's photos, it looks to me like the results are similar.
Q: Does the remover gel also remove gel polishes?
A: A dear reader, Libby, wrote in to answer this question for us, as I don't have experience with gel polishes.
She says, "I had great results and would do it again."
Libby sent a breakdown and photos to me to illustrate each step and I have to agree, it worked really well for gel polish removal! Thank you Libby!
This is, for the most part, a pictorial review - if you have any questions feel free to ask in comments and I will edit in the details!
The pink jar and yellow jar have the exact same ingredient list other than red colorant in the pink jar, so I only bought the yellow jar. I then submitted a contact form on the nail-aid brand website a week ago to ask if there were different percentages of each ingredient and have not yet heard back from them. As far as the ingredient list on the jars, these look like the same formula packaged two different ways - one pink and one yellow. The instructions on the jar are also the same except for step 2, which is a difference in the length of time to let the gel sit on the nail (45 seconds vs. 4 minutes).
Let's try a much more dense glitter shall we? This is two coats for full coverage, it's glitter packed!
You can read more and see product photos at http://www.norubgel.com/, unfortunately, they do not list the ingredients on the webpage. So here they are for the yellow jar:
Acetone, Water, Carbomer, PEG-15 Cocamine, Linoleic Acid, Dimethicone
The pink jar is the same exact list, except for a red colorant which is at the end of the ingredients list.
I emailed the address on their no-rub webpage since I had not gotten a reply from the brand website, and within a few hours I had a response from Jeff about the ingredients and formulation:
"YES. The ingredients are almost the same as you note, but the proprietary formulation differs. "
He didn't say how the formulation differed or offer any other details, but there you have it.
I found the formula to be super sticky, so you'll definitely want to use a paper towel to wipe and immediately wash your hands with warm soapy water. I found that I really needed to scrub and washed my hands twice, once with a foaming sugar scrub.
I would not recommend this product for a few reasons: It's not effective for heavy glitter polish. I had to wash my hands aggressively to get the sticky film off. And that made the whole removal process take longer than using a peel off base coat, a scrubby tub (better known as the A.V.) or the foil method.
Thanks for stopping by!
Questions I've received!
Q: which one did you try or did you try both??
A: I only tried the yellow jar since the ingredient list was the same with exception of the colorant. I did not feel the need to have them both.
Q: What does it smell like?
A: chemically and sharp - similar to other acetone removers.
Q: What does it feel like?
A: The gel is a lot like an aloe gel in texture. When worn it felt really cold on my nail and after wiping it off, it had a sticky feel. You'll definitely want to wash your hands after use.
Q: So....do you like it better than just regular remover? It seems like it takes just as long.
A: I kind of have mixed feelings about it! I think I may prefer it over the foil method since the gel doesn't need foil to work - so that's less trash/mess to deal with. That is really the only advantage I can quickly think of.
I often use a peel off base coat, so I don't use the foil method very often, but for my non-swatching hand where I use regular base coat, I've avoided glitters - I may start wearing them again since discovering this though! I think I want to experiment with leaving it on longer, and see if it works better than my above experiment for the high density type glitter polishes.
Q: Do the different yellow and pink jars get the same result?
A: I didn't purchase the pink jar to try, but I have seen a review of it and based on that blogger's photos, it looks to me like the results are similar.
Q: Does the remover gel also remove gel polishes?
A: A dear reader, Libby, wrote in to answer this question for us, as I don't have experience with gel polishes.
She says, "I had great results and would do it again."
Libby sent a breakdown and photos to me to illustrate each step and I have to agree, it worked really well for gel polish removal! Thank you Libby!
Friday, January 23, 2015
Black Dahlia: Capital Collection
I was given the opportunity to try out Black Dahlia Lacquers and I'm excited to share my experience with you. I received the 10-piece Austin-inspired collection, which is available right now.
Five of the polishes included in the Capital Collection were part of a partnership with Beauty Box 5 and included in a special edition Beauty Box that featured Austin-based companies.
This collection has something for everyone, from crellies and shimmers to glitters and holos.
I've used the color descriptions given to me by Black Dahlia Lacquers, and added some comments underneath each one.
My Butter Half: Gold shimmer with gold micro glitter
Definitely a buttery color that borders champagne gold. It was quite opaque in one coat but I wore two to make sure it was nice and even for the camera and bright lights. The formula was smooth and I love the flat brushes as they allow for more precise placement of the polish on the nail. I had very little cleanup with all of these, thanks to that brush.
Blue Bonnet Bingo: Bright blue crelly with purple shimmer
Beautiful vibrant shade of blue, like a perfect summer sky and those shimmers in there look like iridescent micro-flakies. Such a nice delicate touch for this polish. I wore two coats to reach opacity.
Woke Up on 6th Street: Full coverage muti-dimensional holographic silver glitter polish with strong accents of gold and hints of aqua and navy. Alternatively it can be used as a top coat by applying one thin layer.
Jewel encrusted nails? Check! I used two coats because I wanted to see just how much coverage it would have and it's definitely opaque! The bottle is jam packed with so much glitter, I don't know how they got it all in there! One coat of this polish sandwiched between a jelly would look amazing and be almost opaque.
90 in November: Violet chrome polish with color-shifting shimmer
I grew up in Texas, and the name of this polish is truth! We rarely ever got snow and I was quite a ways north from where Austin is.
I love the shade of purple chosen for this one. It's that perfect medium - not too dark and not too light. The shimmers in it are very pretty and give it that special something. I wore two coats because I tend to paint a little unven, light on the sides and heavy down the middle but you may be able to get away with one coat, especially since it was a little thicker than the others.
Lady Bird Lake: Navy blue linear holo with gold shimmer and gold glass flecks
The perfect blue linear holo - a little dusty, light enough that it doesn't look black on the nail yet still dark and mysterious. The gold flecks remind me of how the sun dances across a lake at sunset leaving a trail of sparkle. I wore just one coat and it stamps really well over lighter colors.
Capital Rose Garden: Coral pink with color-shifting shimmer and the appearance of a scattered holo finish
I didn't think I'd like this color as much as I did so I swatched it first. I really wish I had swatched it last so I could have worn it longer. It has an amazing purple / magenta shimmer and the scattered holo just adds to the effect. It's like a secret surprise of my favorite color lurking in there just for me. I freaking love this polish - it's one of my two favorites of the whole collection.
South Congress Bats: Light army green with the appearance of a scattered holo finish
My other favorite from this collection. Such a stunning work of art, this polish! It's so complex and it kept me guessing as I wore it, as to what was in it that gave it such a wow factor! It looks holographic and iridescent at the same time and has dimensional qualities. I don't think my photos do it justice, you really need to see this one in person to get the full effect.
SXSW Fever: Dark teal with green shimmer and bright blue flakies
Very pretty shade of polish and I enjoyed the pop of blue in it along with the shimmer. I wore two coats for opacity and the formula was easy to apply.
Austin City Limits: Pale periwinkle purple linear holo with blue glass flecks, gold shimmer and gold micro glitter
This one reminds me of winter and how the sun bounces off the ice crystals and snow beneath the pale blue sky. I wore two coats for opacity.
Barton Springs Babe: Green crelly with blue-green shimmer and navy flakies
The contrast of the blue flakies make this polish quite unique. I love the look of it, almost like a shimmering granite or marble. I wore two easy coats and topcoat.
Overall, I really enjoyed wearing this whole collection. I feel like a lot of thought went into the packaging and creation of each polish to get it just right. The palette of colors makes for endless ideas of nail art or pairings and easily has something for the office and the disco. The formulas on each were good, no issues to report.
These polishes and others can be purchased at www.blackdahlialacquer.com and a secondary shop at https://www.etsy.com/shop/BlackDahliaLacquer. Most polishes will cost $6 for the 8 ml version and $9.50 for the 14 ml full size. Austin City Limits, Lady Bird Lake and Silver Lotus will cost $6.75 for the 8 ml size and $10.75 for the full size version.
All Black Dahlia Lacquer polish is mixed by hand in small batches and has undergone rigorous testing prior to release. The company is owned by Deanna Morey, a former writer, and her daughter Aubrey Sheffield, a college student. They make a stellar team, don't you think?
Subscribe to:
Posts (Atom)