Pages
▼
Thursday, August 30, 2012
Easy Glitter Removal
Surely everyone would love a quick, easy, no fuss way of removing that beautiful glitter bomb right?
I just spotted the most brilliant idea for glitter polish removal!!
Blogger Pretty Purple Polish has such a detailed post about it, that I wanted to share it with you.
Check here: http://prettypurplepolish.blogspot.com/2012/08/peel-off-base-coat-for-easy-glitter.html
And then Here for more details: http://prettypurplepolish.blogspot.com/2012/08/pva-glue-base-coat-questions-and-wear.html
Magical Mystery Tour
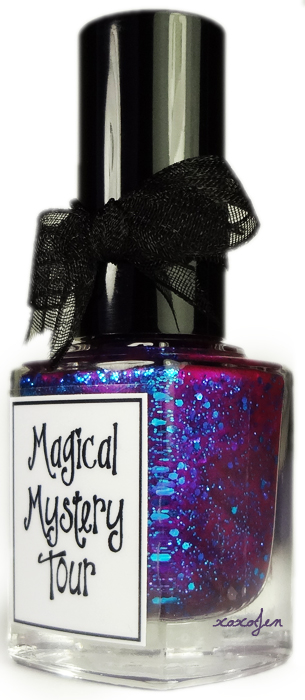
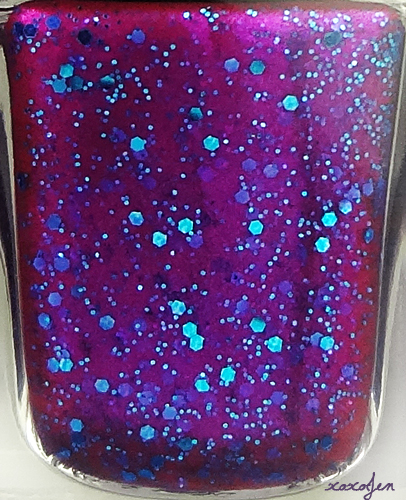
Magical Mystery Tour is a beautiful shade of violet shimmer polish with blue hex and micro glitter throughout. It builds well in two coats, but I did a few extra swipes up the sides, as the sides of my nails always seem to have less coverage/thinner coats.
Just look how glowy it is on the nail! -swoon-

Magical Mystery Tour looks great mattified with NYC Matte Me Crazy, take a look!
NYC Matte Me Crazy is a recent purchase and I have found that it gives more of a satin finish than matte. It also takes a little longer to dry compared to other matte top coats I've tried.
If you're after a satin finish and don't mind the dry time, do check it out!
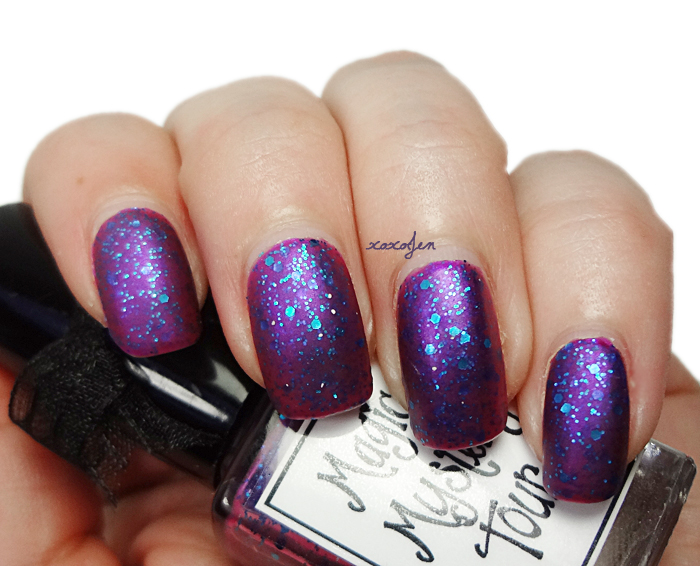
I really love Magical Mystery Tour from Whimsical Ideas, it was so freaking easy to apply - like brushing butter over my nails! No glitter fishing or dabbing, no bare spots, no cuticle drag, nada. Piece o' cake!
This is one of my favorites from Whimsical Ideas polish line, what are yours?
Wednesday, August 22, 2012
Who's your hero?
I have a few, but the first that come to mind are my mom and my dad. They always had all the answers, knew how to make a scrape feel better with a magical kiss, picked me up when I fell and made my world a magical place.
With them in mind, I present Whimsical Polish Super Hero!
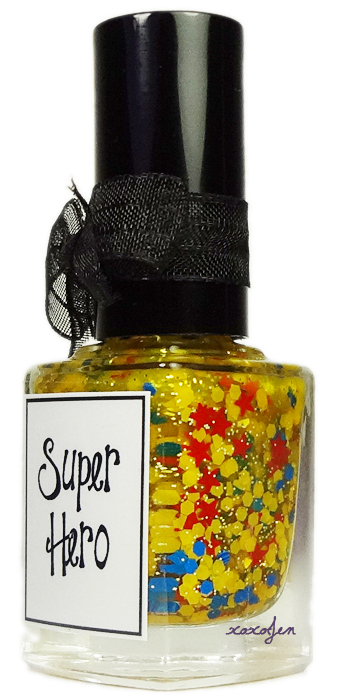
Closer look, shall we?
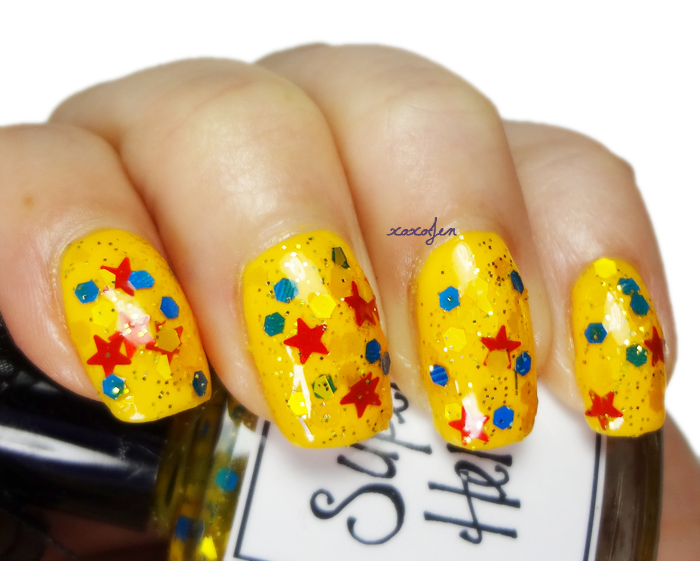
Satin yellow and matte blue hex amongst matte red stars and fine gold glitter - all this in a yellow jelly base.

Two coats of Sinful Colors Pull Over, two coats of Super Hero, Gelous and HKG top coat

Another angle to see those yellow hex, they're pretty nifty!
And finally the matte look!

And let's zoooooom in!
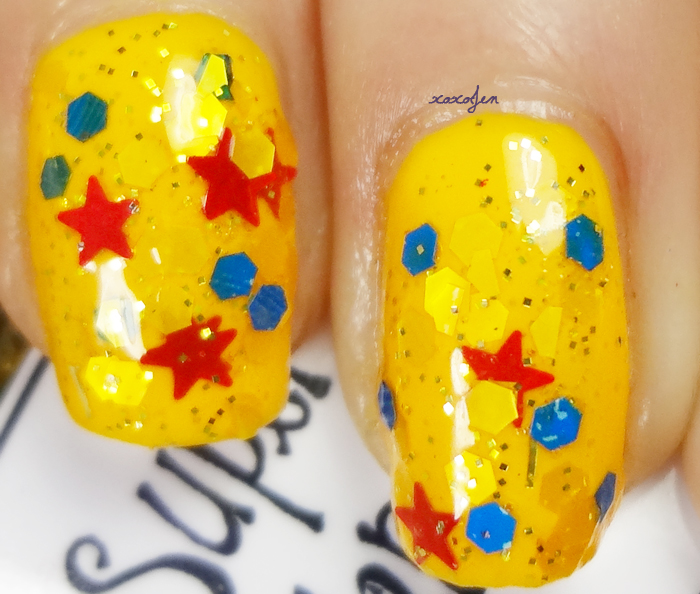
What do you think of this combo?
Who are your heros?
With them in mind, I present Whimsical Polish Super Hero!

Closer look, shall we?
Satin yellow and matte blue hex amongst matte red stars and fine gold glitter - all this in a yellow jelly base.

Two coats of Sinful Colors Pull Over, two coats of Super Hero, Gelous and HKG top coat

Another angle to see those yellow hex, they're pretty nifty!

And finally the matte look!

And let's zoooooom in!

What do you think of this combo?
Who are your heros?
Monday, August 20, 2012
"Oh Poo! I broke another nail!"
Not only is this true for this situation, but I have quoted it because its a line from a play I was in when I was very young. As soon as I break a nail, this line comes to mind and it makes me giggle.
Breaking a nail is not really funny so I am going to show an easy way to repair it without spending much money or time, and maybe you'll even giggle along with me.
You'll need:
Scissors
Toothpick or two
Super Glue/Nail Glue
Empty, dry Tea bag
Base Coat
Top Coat
Medium/Coarse file
Fine/Extra Fine file
Protect the surface of your work area
(acetone just in case)
My grandmother was a cosmetology instructor and she taught me this little trick at a very young age, and it totally works! I had the nail repair below applied for three weeks and two polish changes and it held up really very well. I just trimmed and filed the nail as it grew out.
1. Cut a small piece of drt tea bag to cover the break allowing extra on either side of the split, but not touching the skin. The fibrous paper will act as a bandage.
You can use other materials but if they are thin or not as durable, two layers of the 'bandage' is recommended.
2. Apply a drop of super glue near the split and spread it around with a toothpick. Place the 'bandage' on top of the split and pat down with toothpick to saturate. Place a drop or two more of superglue on top of the bandage. Spread it around with the toothpick gently so that the bandage piece becomes saturated.
If the nail tends to pop up or is misaligned, use the toothpick to hold the nail in place until dry. Do not use your own finger as it may adhere!
3. After the superglue/bandage has dried, apply base coat and top coat in several layers to thicken the nail up a bit. Be generous in this phase because next is filing.
I use Gelous and Seche Vite and can recommend those as they have worked well for me. If you're used to working with gel or acryllic, you can use those too.
4. Once everything is good and dry, check for bumps and lumps. Use your own judgement to determine whether a coarse or medium file needs to be used. Smooth away those bumps and then use the fine file or buffing file to smooth it all out.
5. Apply polish and viola!
6. When doing a polish change, you may need to repeat steps three through five.
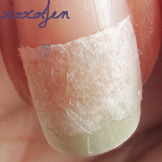
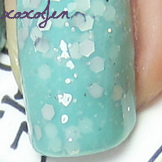


The repair will hold up really well through normal use. It doesn't hurt to baby it a little but you can do normal things with it too. When I have repairs like this, I can still type all day, wash my hair, scratch an itch and it holds up just like a natural nail does.
Becacine tried my repair method and had a good result. She said I could share her photos, so here are those!
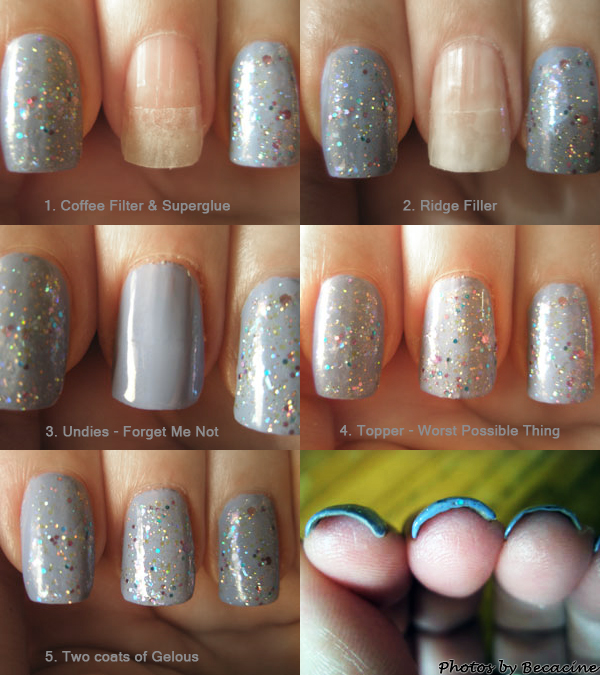
Have you ever broken a nail and repaired it? What method did you use?
Sunday, August 19, 2012
Cheese anyone?
I (heart) NY matte
I've mattified I heart NY and I like it, but I like the glossy version best.
What do you think of it this way?
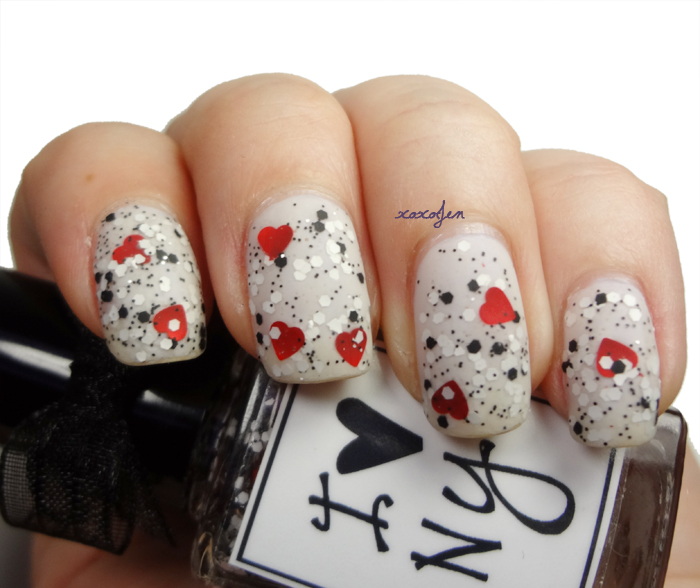
(matte top coat is Hard Candy brand)

What do you think of it this way?

(matte top coat is Hard Candy brand)

Friday, August 17, 2012
Indie Shop List update
The indie shop list has been updated and now there are a total of 240 open shops!
Thursday, August 16, 2012
Whimsical Ideas by Pam: I (heart) NY
There is a depth with this layering combo that I just cannot catch in my photos. I absolutely love this!
Revlon Powder Puff under Whimsical Ideas by Pam I <3 NY


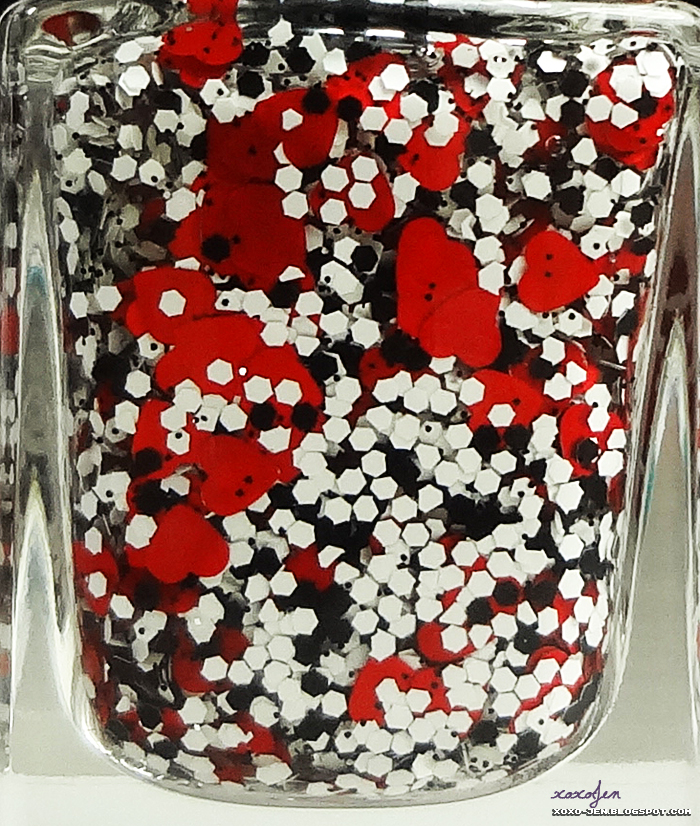
Revlon Powder Puff under Whimsical Ideas by Pam I <3 NY


Wednesday, August 15, 2012
Monday, August 13, 2012
Thursday, August 9, 2012
Chocolate sparkle
Monday, August 6, 2012
Frankens From Friends
I am a member of a small closed community of nail polish fiends who are very creative and enjoy frankening as a hobby. I was lucky enough to get my mits on several of their creations and lemme tell ya they're - well, lemme just show you a few!

Shrieking Eels made by TK
Grey jelly base with teal glitters
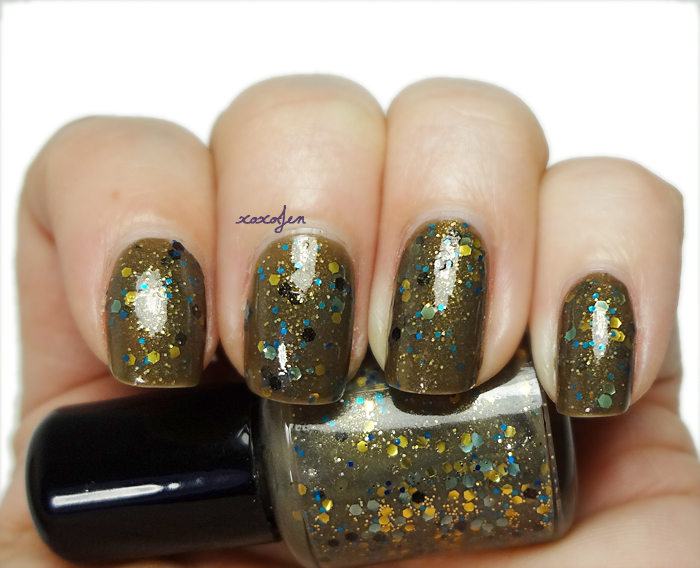
Dalek inspired polish (unnamed) by Tgirl
I hope you've enjoyed the photos!

Shrieking Eels made by TK
Grey jelly base with teal glitters

Dalek inspired polish (unnamed) by Tgirl
I hope you've enjoyed the photos!


